Tidy your music folder: organising MP3s with bliss
bliss is a software tool to organise digital music libraries. Unlike other music taggers, its primary aim is to reduce inconsistencies within your library to make your music collection beautiful. It saves you time by automating all of this as much as is both possible and desirable.
This is a tutorial about using bliss to organise the music files within your music folder. It begins assuming bliss has already been installed and is ready to start. The goals of this quick start guide are:
- Learn a little about how bliss works
- Learn how music files are stored on your computer
- Learn how to configure bliss's simple file organisation rule
- Learn how to rename music files or folders
How bliss works
bliss is designed as a long running server application that applies rules to a music collection. There are two functions of rules; assessment, which is judging whether your music is compliant or non-compliant, and the suggestion of automatic or suggested fixes. This is the assessment and automatic fix cycle. You can read more about the assessment and fix cycle in the "First steps..." cover art tutorial.
The most important takeaway is that the file organisation rule works in the same way as the cover art rule. It follows the same assessment and fix cycle. bliss first assesses whether the files are stored in the correct place, then, if they are stored incorrectly, either fixes them or suggests a fix to you to execute manually.
How music files are stored on your computer
Typically, a computer has one location under which all music files are stored. This location is on your hard (or, more modernly, solid state) disk. Some operating systems have common locations for this. For instance, the default location in Windows is C:\[your username]\My Music\. We call this the music folder. Sometimes it's also worth having separate music folders holding separate collections. For instance, collections for different users of the computer, collections which are made up of different music file formats for playing on different devices and more.
In addition, NAS devices are like hard disks that are plugged into your network. You can choose a location on a NAS to store music within, and then have your computers connect to it. The location on your NAS is still your music folder.
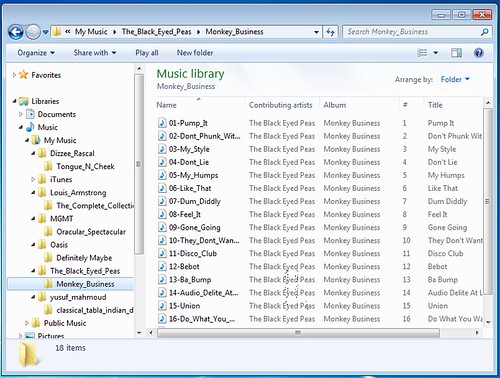
Within your music folder are your music files. These are the .MP3, .MP4, .OGG or .FLAC (et al) files that contain all your music. And, typically, these files are themselves arranged into folders. Commonly, files for the same album are grouped into a folder named after the album. Albums by the same artist may be grouped together in a folder named after the artist. Different people have different schemes for how the music folder is structured. Unfortunately, over time the consistency of this structure becomes compromised. Different CD rippers (software that converts audio CDs to digital music files) store music files in different structures with different capitalisation rules, rules for how spaces are treated and other differences. You end up with a confusion of different structures and naming rules for digital music files.
bliss allows you to specify a master 'pattern' that describes how all music should be structured. bliss assesses your current music files and folders against this pattern and tells you if the music complies with your pattern. If it doesn't, bliss suggests fixes to rename or move music files to the correct folder and file name. It can also perform this fix automatically.
Configuring bliss for the first time
So, let's organise some music files! Let's begin by downloading and installing bliss. You can download it by clicking the button below and running the installer. If you're using a Mac, you can just open the .dmg file and run that direct.
Now start bliss from (Windows) the Start menu or desktop, (Mac) the Dock or the downloaded .dmg file, (Linux) the menu, desktop or the command line. Once started, visit the user interface (UI). Either click the bliss icon in the system tray or open a Web browser and point it to http://localhost:3220 ![]() (if you are running bliss on the same computer as the browser).
(if you are running bliss on the same computer as the browser).
You configure bliss using the 'settings' pane of the UI. The first time bliss runs the settings pane is automatically opened. Otherwise, click the 'settings' link on the home page and the settings slide down. The settings pane allows you to specify where your music is and allows you to specify and configure your rules.
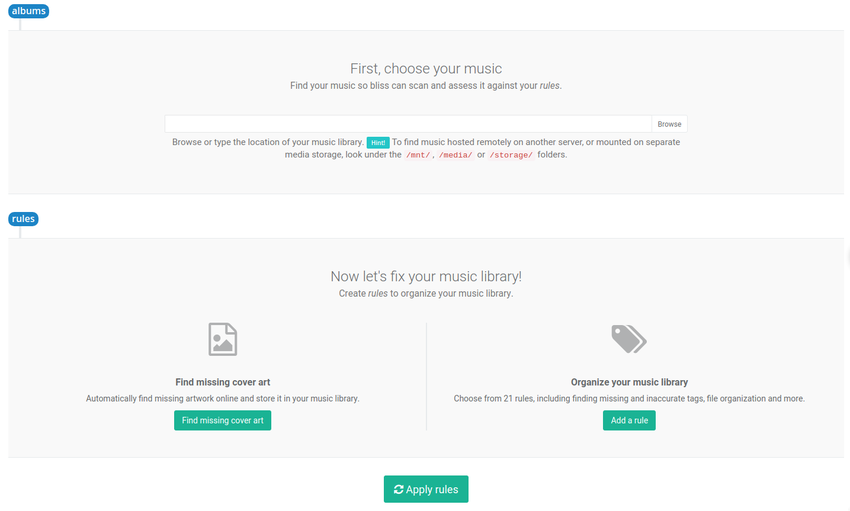
First, locate your music. This is the root music folder I discussed above, and contains of all your music files. For instance, you may have your music files in folders for artists or albums. Choose the folder that is the parent of those folders. On Windows and Mac, this will be pre-populated to the default music location, but you may wish to change it. Use the 'Browse' button to navigate through the folders on the computer bliss is installed on. If you have your music on a NAS, you will have to 'map' or 'mount' the NAS folder to location of your hard disk, such as a drive letter (on Windows) or some other folder (on Mac or Linux).
Now, time to configure the file organisation rule. Under 'Configure rules' click the 'Rename music files' link. This opens a new box for you to configure your rule.

The rule is fairly simple. You specify the pattern that determines the structure of your music folder. There are a few pre-populated patterns or you may specify your own. For instance, "artist-album/tracknum-trackname" means: store a parent folder named after the artist of each recording followed by the recording name in the root of the music folder, then within those folders store separate track files for each track, beginning with the track number, then a hyphen, and then having the track name (bliss automatically adds the file extension, e.g. .MP3). Whitespace-handling is also determined by this pattern, although more implicitly. For example, whitespace will be replaced by an underscore. This is the default behaviour, and can be altered by specifying a custom rule. Capitalisation always follows the capitalisation of the relevant information (e.g. album, artist or track name).
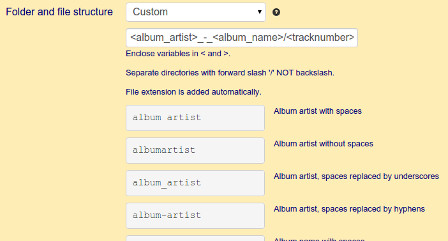
If none of the pre-populated patterns are applicable, you can specify your own. Choosing 'Custom' reveals an extra text field into which you can type your pattern, and also shows a reference of the available variables. Each variable has a few variations. For instance, "album_name" can be replaced by "albumname" or "album-name" which either removes all whitespace or replaces it with a hyphen, respectively. Type the pattern into the text field, with each variable enclosed by < and > characters. Any other characters you add in are used literally, for example you could move all music in your music folder into a sub folder "subfolder" with the rule subfolder/<artist-name>-<album-name>/<tracknumber>-<track-name>.
The file extension of a music file, for instance .MP3, is implied by the custom patten, meaning that whatever you type in the custom text field your music file paths will always be suffixed with the correct extension. However, the fileextension variable is still there for your use. You could use it, for instance, to organise music files by file type.
You can also specify whether the file organisation rule automatically moves and renames music folders or files to their compliant form. This will save you a lot of time, but I recommend using this after you've fully understood how bliss will suggest the files and folders be renamed. Set "Move files and folders" to "Manually" for now.
Now, click the 'Apply rule' button and bliss begins the assessment and automatic fix cycle.
File structure assessment and moving/renaming music files
Now you have applied the rules, bliss assesses the file locations of each album against the rule and replies with suggested fixes to resolve any non-compliance.
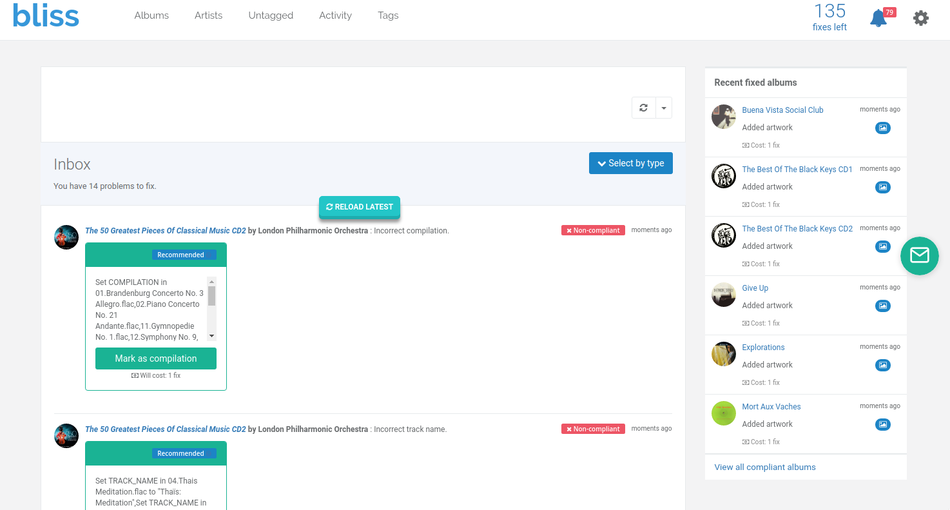
The overview page in bliss shows each album, ordered by name, in a grid. While bliss is assessing an album, it is marked 'Unknown'. This changes to 'Compliant' or 'Non-compliant' once the results of assessment against your file organisation pattern is returned. Albums can be filtered by their compliance and by the first letter in their name.
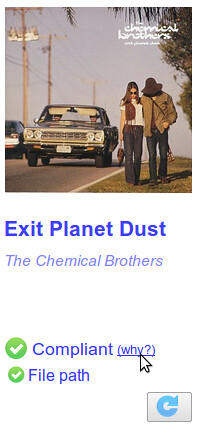
So what's happening during assessment? We configured the file organisation pattern. For each album, bliss compares the location of each track file to the location it would expect assuming the file organisation pattern were adopted. If the location matches the pattern, bliss returns 'Compliant' and all is right with the world (or at least, that album). If the location does not match the pattern, bliss returns an 'Non-compliant' result, meaning the track's path is incorrect and should be renamed or moved (renaming and moving are pretty much the same thing). When an album has completed assessment, the album shows whether it is 'Compliant' or 'Non-compliant' on the overview page.
Once an album has been assessed and has been marked either 'Compliant' or 'Non-compliant' you can find out why by hovering over the album and clicking the 'why?' link.
The 'why?' link expands different parts of the assessment, which generally relate to aspects of the rules you configured. For instance, if you enabled the cover art rule in addition to the file organisation rule, aspects of the cover art assessment will also appear here. You can click on any of these to see more detail about the individual assessment.
To get more detail, you can drill into the file organisation detail of the album by clicking either the "File path" link or clicking the album name, then the file organisation link on the album detail screen. Here's the file organisation detail page:
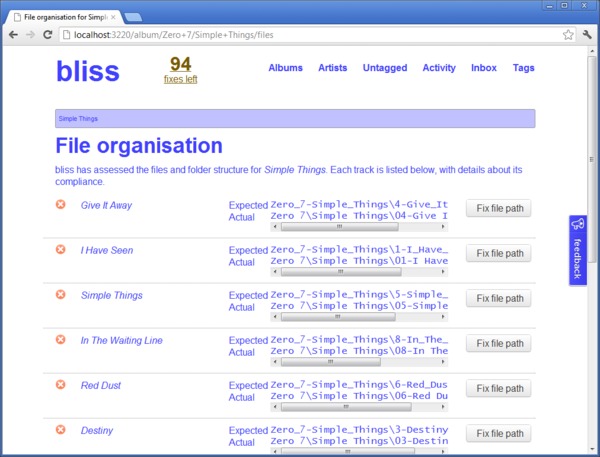
On the file organisation detail page you can see all the tracks for the album, what bliss expected the file location to be and what it actually was. If the paths differ the track is non-compliant, and so bliss offers a fix to move or rename the track file.
In the example above, you can see all of the tracks are non-compliant. The primary reason for this appears to be that there are spaces in the file paths, whereas my pattern required underscores. Each of the fixes will thus change all of the spaces to underscores, re-assess and, hopefully, mark the album as compliant.
This assessment runs for all albums on initial startup, and then whenever an album is either changed or added.
Renaming and moving music files and folders
If a track file's expected location differs from its actual location, this means the track is non-compliant. When a track is non-compliant, bliss offers a fix to move or rename the file. This fix is avaiable in two places: either the album overview screen against each album, or in the file organisation page for any one album.
In the album overview screen, a link titled "Fix all file paths" appears next to the album. Clicking the link will correct all file paths that differ from the expected path within this album. This will also trigger re-assessment and, hopefully, the album should be refreshed and newly "Compliant".
The file organisation page offers more detail and more fine grained control. Here, you can also trigger the same "Fix all file paths" fix for all tracks, but also trigger individual fixes for individual tracks/files. Either way, re-assessment occurs a few seconds later.
Disabling the file organisation rule
To disable the file organisation rule, click the 'disable' link on the top-right of the within the file organisation rule settings, then click 'Apply rule'. All of your albums will be re-assessed, this time ignoring the file organisational aspects of the album.
This concludes the file organisation tutorial. Hopefully you've learnt a little about how bliss works and what you'd expect to see when you use bliss. Your next step is to download bliss, install it and begin fixing your music folder!
