Installing VortexBox 2.3 on KVM
June 03, 2014 in digital music by Dan Gravell

I use VortexBox as my home music server. It's a great all-in-one music server, being the lynchpin of my home music network. And so, when VortexBox 2.3 was released, installing it went right to the top of my to-do list!
I operate a slightly different setup to other people. Most people dedicate VortexBox to its own physical server. In my case, I have multiple different similar services to provide: file serving, TV recording and serving and a file backup server. To avoid having multiple physical servers I adopt a practice called virtualisation to consolidate all of my different servers onto one physical server.
The particular software I use for virtualisation is KVM. I use this because all of the servers in my network are Linux based, and the packaging and toolset are ideal for use from a physical Linux server "host" machine.
Installing VB 2.3 on KVM
VortexBox 2.3 installs are recommended to be done as a fresh new install to a computer, not an upgrade (although some people are working on that!).
This means I needed to create a new KVM virtual machine. But before I did that, I downloaded the CD image from the VortexBox download page and saved the image in a location accessible by the KVM host.
To create a new virtual machine I used the virt tools package, in particular virt install. This package is easily installable into Xubuntu Server 11.10, my host server (a little old now, I know!). To create the VM:
sudo virt-install --connect qemu:///system -n vortexbox -r 1024 -f /mnt/vm/kvm/vortexbox3/disk.img -s 35 -c /mnt/media/iso/vortexbox-2.3.iso --vnc --noautoconsole --os-type linux --os-variant fedora16
This creates a new KVM virtual machine:
- -n vortexbox
- The name of the virtual machine
- -r 1024
- The amount of RAM, in MB
- -f /mnt/vm/kvm/vortexbox3/disk.img
- The location of the file which will be the VM's hard disk
- -s 35
- The size of the hard disk, in GB
- -c /mnt/media/iso/vortexbox-2.3.iso
- The path to the install CD image
- --os-type linux --os-variant fedora16
- The guest OS that is being installed.
The size of the storage, 35 gigabytes, was chosen on the advice of the VortexBox forum.
The guest OS of fedora16 was the latest version of Fedora offered. I guess this is because I'm using an old version of virt tools. Ideally, fedora20 would be used, as that's VortexBox 2.3's underlying operating system. Still, it worked.
That started up. All I got was:
Starting install...
Creating storage file disk.img                                                |  20 GB     00:00
Creating domain...                                                            |    0 B     00:01
Domain installation still in progress. You can reconnect to
the console to complete the installation process.
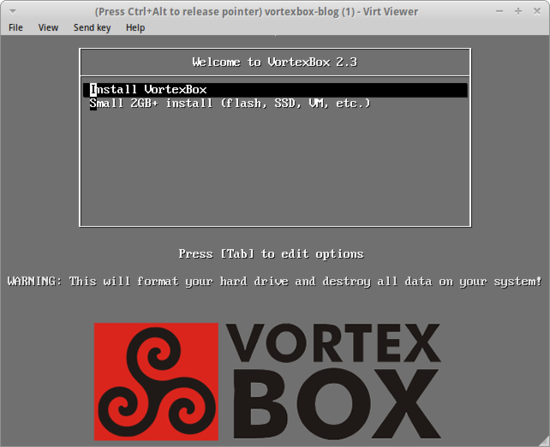
That's because all this was written on my headless (no monitor, keyboard or mouse) server. I needed a way to interact with the installer, so I used virt-viewer on my workstation. That showed me what was going on in my new VM:

Here's where I made my first false start. I chose the default Install VortexBox option. This hit a brick wall a few screens later where the install would hang with no feedback. If you're installing VortexBox 2.3 in a VM, use the Small 2GB+ install (you know, the one that actually says it's for VMs...).
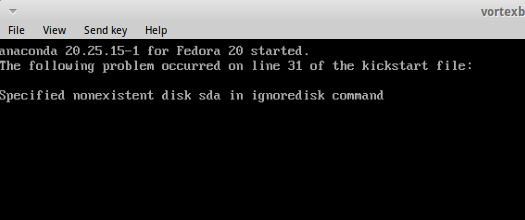
After that face -> palm moment we started making progress. The installer itself is an online one, downloading the required packages as the install progresses. This download proceeded successfully but that's where we hit another problem:

For the Google searchers, that's specified nonexistent disk sda in ignoredisk command.
The reason this occurs is that the VortexBox installer appears to assume the installation will occur on /dev/sda. That's the Linux name for a drive that isn't an IDE drive. Unfortunately, our VM was built, by default, with just the opposite: an IDE drive, which following Linux convention is named /dev/hda. Luckily, virt-install allows this to be customised:
sudo virt-install --connect qemu:///system -n vortexbox -r 1024 -c /mnt/media/iso/vortexbox-2.3.iso --vnc --noautoconsole --os-type linux --os-variant fedora16 --disk path=/mnt/vm/kvm/vortexbox3/disk.img,bus=scsi,size=35
- --disk path=/mnt/vm/kvm/vortexbox3/disk.img,bus=scsi,size=35
- Provides greater control over the disk created
Before, I was unwittingly using the deprecated -f and -c switches. --disk gives greater control and allows the bus type to be specified. By specifying scsi this sets the bus type to SCSI and therefore the drive is named /dev/sda, allowing the installation to proceed.
From there it was plain sailing! I noticed that SSH access was granted before the install was complete. Visiting the VortexBox web page at this point shows a message to the effect that the installation is ongoing. It's also possible to watch the progress by keeping an eye on the /var/loy/syslog file.
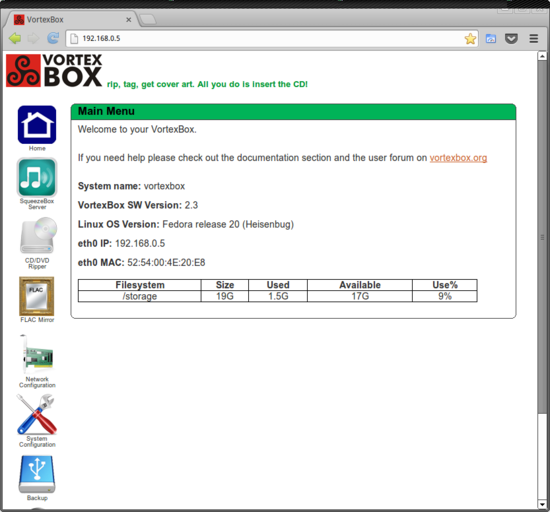
Eventually I was welcomed by the main menu:

VortexBox 2.3 installed! Now to install bliss...
Thanks to LaserGuided for the image above.

