Ford SYNC album art
June 28, 2016 in digital music by Dan Gravell
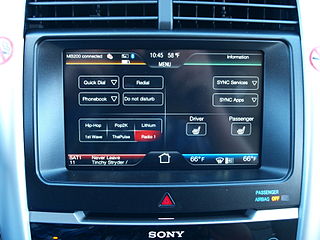
SYNC is the Ford Motor Company's in-vehicle entertainment system; it's been around for almost a decade. We now have SYNC 3 which is being deployed in a large proportion of Ford cars (over half of the US fleet) from the end of 2016 onwards.
SYNC's large touchscreen interface in the car's dashboard is a perfect place for displaying album art for your music. As we know, album art completes your digital music experience (although probably a good idea to keep your eyes on the road!)
SYNC allows you to hook-up a USB device containing your music to SYNC system, which duly scans the music files and makes them available to play, complete with album art to help you choose music and display as you are driving. Well, that's the theory... only plenty of people seem to report problems getting the artwork to display!
This article is SYNC-version sensitive!
These instructions were originally written for SYNC version 2 but also work, in theory, for 3. However, I have had a few reports that SYNC version 3 has a known issue that its internal Gracenote database is always used (regardless of remote Gracenote being enabled/disabled) and therefore is not reading user-supplied artwork at all. If you have experience with SYNC 3 and might know what's going on, drop a message in the comments or send me an email.
Edit 25/9/2017. A correspondent has informed me that the early versions of SYNC 3 worked ok, and it was after an upgrade from v1.0 to v2.3 (of SYNC 3) that they began experiencing this Gracenote issue.
Edit 10/11/2017. Another email has arrived, suggesting v3.0 of SYNC 3 fixes the issue, and embedded art is once more viewable in SYNC 3! More evidence welcome...
Edit 23/03/2018. Another confirmation that v3.0 of SYNC 3 fixes the issue. It appears pretty certain that SYNC3 v3.0 fixes the album art problem.
Edit 30/04/2018. Final confirmation that SYNC 3 v3, from build 18025 onwards is now fixed. When Gracenote is disabled, only the artwork from your own music files is used. Download from here (UK link)!
You can check your SYNC 3 version by (on the SYNC 3 interface):
- Press _Settings_.
- Press _General_.
- Scroll down and press _About SYNC_.
Using bliss to complete missing SYNC album art
First, download and install bliss:
Now start bliss. Once you have started, visit the Albums page (the default page), click the settings cog at the top-right of the page.
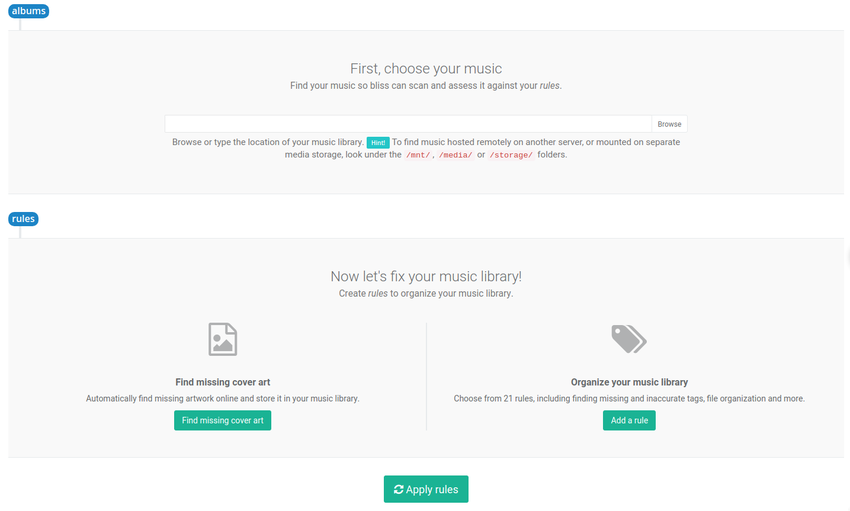
First, enter the location of your music library. This depends on how you move music to your Ford. If you store it on your computer, or a NAS, for later transfer to your USB device, enter the path here ( in the case of a NAS, the UNC path or mapped/mounted location can be used). If you store it directly on the USB device you plug into your Ford, you can still choose the mapped or mounted location, e.g. Z:\
Once you have entered the location of your music, onto the next step! Under Cover art click the ON/OFF button to enable the cover art rule. You get the cover art settings:
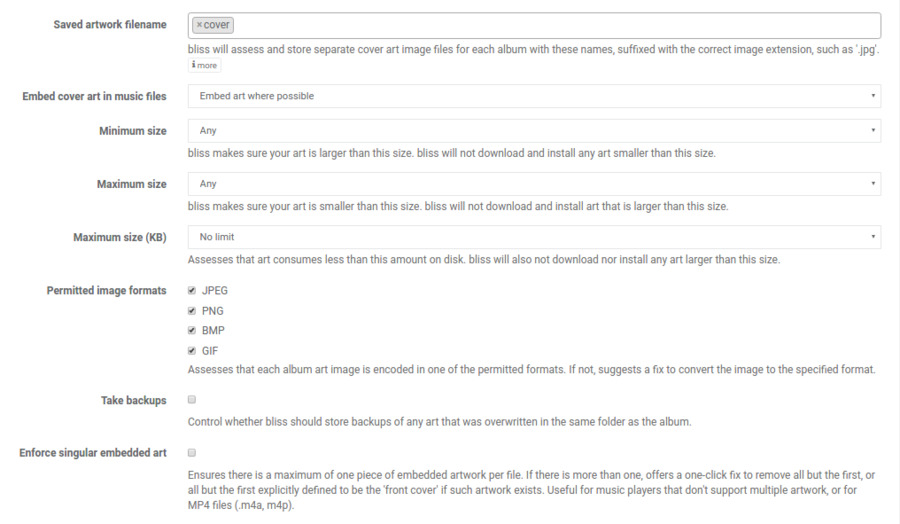
We can now set the SYNC album art rules. But before we do that, we need to work out what the rules should be!
Ford SYNC and cover art
SYNC has two methods of showing artwork: either from the device itself, or from Gracenote, a commonly used music database. The default is to prioritise the device, which I would recommend. This allows you to control the artwork chosen, reducing the chance of an incorrect lookup from Gracenote.
Now, making sure that SYNC displays the artwork on the device means ensuring the art within the device complies with SYNC's rules. These rules are:
- The image must be embedded in the music files.
- The image itself must have a resolution no larger than 500x500.
- The image must be embedded in an ID3v2.3 tag, and not any other version of ID3!
So that means you need to do two things: (1) fill in missing artwork that complies with the above and (2) fix existing artwork which doesn't.
Because there are so few rules, all we need to do is:
- Check Embed cover art in music files is set to Embedded (the default)
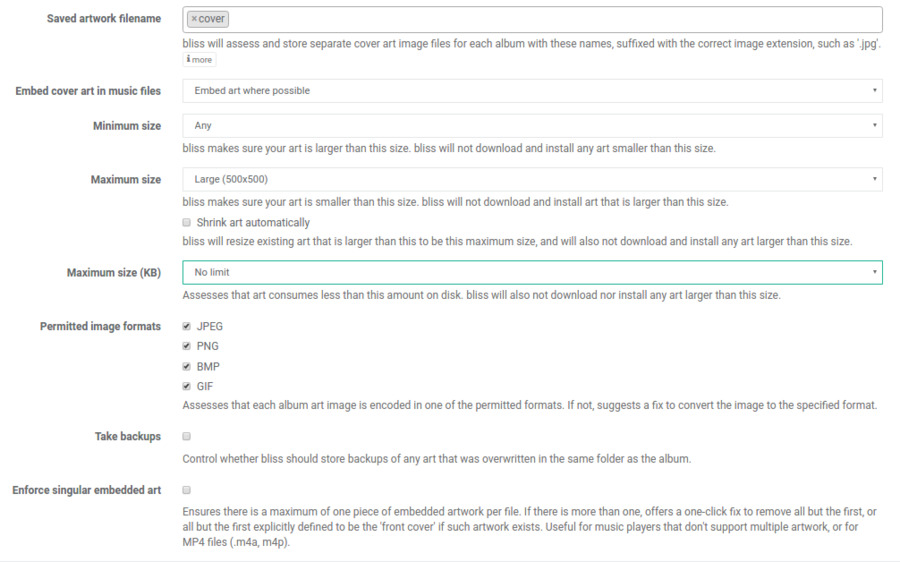
- Set Maximum size to 500x500
I leave it to you whether to check Shrink art automatically. If you do, bliss automatically replaces existing art which is too large with smaller art. See below for more on this.
The settings should now look like:
Now we need to ensure we are only saving ID3v2.3 tags. Back in the Configure rules panel, click Add ID3v1/2 tags to MP3s and scroll down to the Tag types section. Set the ID3v2 tag to be ID3v2.3 and set it to Require.
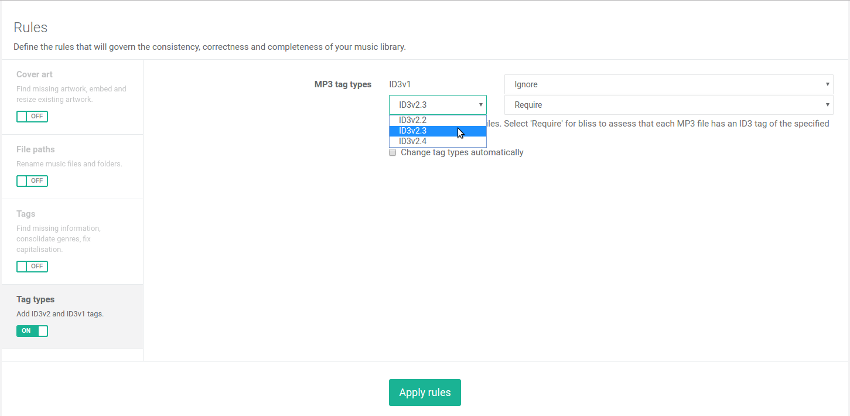
Like with the too-large artwork setting, there's a checkbox to change to ID3v2.3 tags automatically.
Now click Apply rules and bliss will begin assessing and fixing your artwork!
If bliss finds an album without embedded art, it will find artwork with a resolution below 500x500 online and install it, embedding it.
If bliss finds an album with artwork which is over 500x500 KB its action depends on the Shrink art automatically setting. If Shrink art automatically is unset, bliss will simply check the albums and mark albums with artwork greater 500x500 Non-compliant. You get a chance later to choose an alternative (see below). If you do check Shrink art automatically, bliss will shrink the existing art and re-embed it automatically.
If bliss finds a file without ID3v2.3 tags (only MP3 files being considered), its action will, like with shrinking art, depend on the automatic switch, in this case Change tag types automatically.
Once bliss's scan is complete you will be left with:
- The original albums that displayed ok and are within the rules you set (bliss does not touch these)
- Albums that were missing artwork, which bliss has automatically added artwork below 500x500 for
- Albums that had artwork over 500x500, which bliss has automatically shrunk or Non-compliant albums that contain artwork that is above 500x500
- MP3 albums with newly automatically added ID3v2.3 tags, which bliss has automatically added or Non-compliant albums that contain ID3v2 tags that are of a different version
If you have these non-compliant albums with artwork that is too large, they can be addressed in two ways: either on the Albums page, or on the Inbox page (which also allows for bulk fixes). On the album page, first filter the page to show only albums with artwork that has too high a resolution. Under Compliance is:
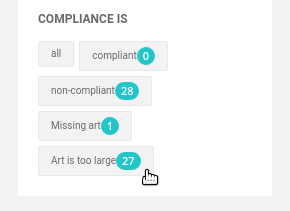
Click Art is is too large and the albums list will filter to only albums that are non-compliant because of their too-large artwork.
In the resulting list of non-compliant albums, hover your mouse over an album and a why? link appears. Click it and you get more information about the compliance of an album:
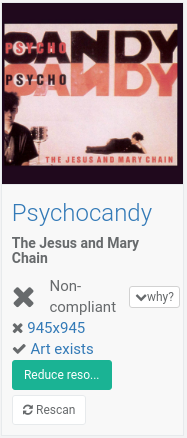
You'll also see some buttons to shrink the artwork - Reduce resolution. Click them and all artwork for that album will be shrunk. The album will then be re-assessed, and should be compliant as a result (assuming no other rules are in place and causing the non-compliance).
Alternatively, the Inbox lists all outstanding fixes for your library in one place:
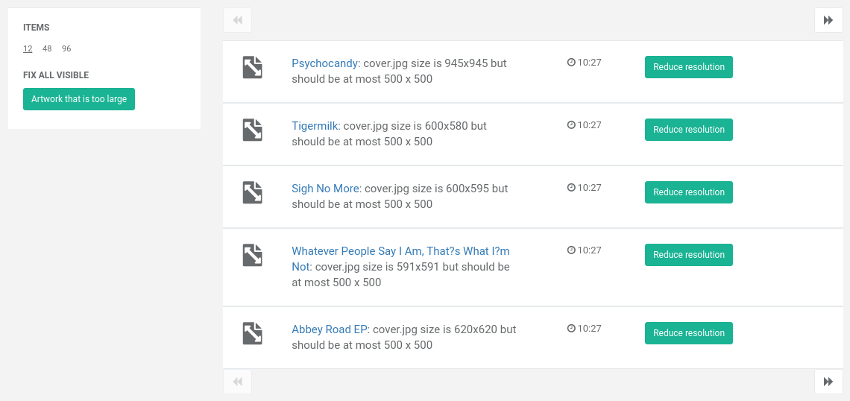
This provides a way of grouping all of the fixes in one place. Even more usefully, the Fix all visible button allows all visible fixes of a given type to be executed at once. Used in conjunction with Items per page you can zoom through an entire collection of too-large artwork in no time:
Just as with the Albums page, when you click a fix on the Inbox the album will subsequently be re-assessed for its compliance.
Fixing any ID3 version problems can be done similarly; either via the Albums page, or the Inbox. Again, the Inbox can be used to quickly execute all of the visible fixes, but you may find it even easier to open settings again and enable the Change tag types automatically option, followed by Apply rules to re-scan, this time adding the tags automatically.
Making sure SYNC sees the changes
Sometimes you need to perform a final step to ensure SYNC actually sees the changes you've made to your artwork.
After plugging in your device via the USB, open Sync Media Options and in there you'll find Reset USB. This invokes a rescan of the device, and hopefully the population of all that album art!
Doing it manually
It is possible to do this using software yourself, not using bliss. Likely, you will already have noticed where there are blanks in your library, so it is pretty easy to identify which albums need artwork, or have artwork which is too large. You can search for artwork on numerous sites and then embed this artwork your music files using a music tagger. In addition, this post on Focus Fanatics gives a good walkthrough for how to use MusicBrainz Picard.
You'll need to ensure the image you choose is under 500x500, as outlined above. In many cases this is shown on the website you are downloading from. But if not, download the image and use your operating system to tell you: on Windows, right-click then Properties then Image, on OS X, right-click then Get Info and then More Info.
If you have a mere handful of albums with missing or too-large artwork, that's probably the most expedient way. However, if you have a lot of albums breaking these rules, cleaning up these album covers will begin to get tiresome quickly. Plus, when you add albums to your collection, you have to remember what you did last time.
I hope this helps complete your Ford SYNC album art! Happy driving (and listening!).
If you find any more tips for album art with the Ford SYNC series, let me know in the comments below. I'm aware that SYNC 3 is rolling out now, so maybe these rules will have to be changed. Whatever you find out, let me know and I'll update the post!
Thanks to Randy Stern for the image above.


